Patrol 4x4 - Nissan Patrol Forum banner

Jamie's 4.8 GUIV ute

314K views 1.7K replies 134 participants last post by  Jamie4800  
#1 · (Edited by Moderator)
Usual story, been here for a while, decided to final put together a bit of a thread.

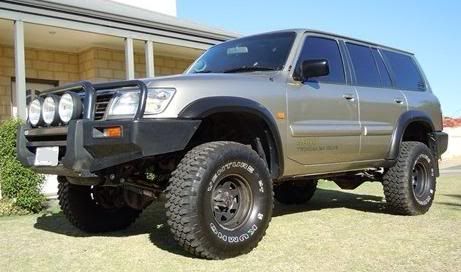
Purchased a 2002 4.8 GU III, had 190k on the clock but only 85K on the engine. previous owner blew it up and swapped it out. So far has with the following mods:

- 5" Suspension Lift
- Oztec shocks
- Tough dog coils
- Tough dog front and rear panhards
- Tough dog RTC steering dampener
- castor plates
- 35" Kumho mud terrains on 15 x 8 steelies
- Steel Bullbar
- 3 x Hella rallye 2000 halogen spotties
- Colour coded exterior door trim and handles.

Previous owner had it professionally detailed before I bought it,

Image


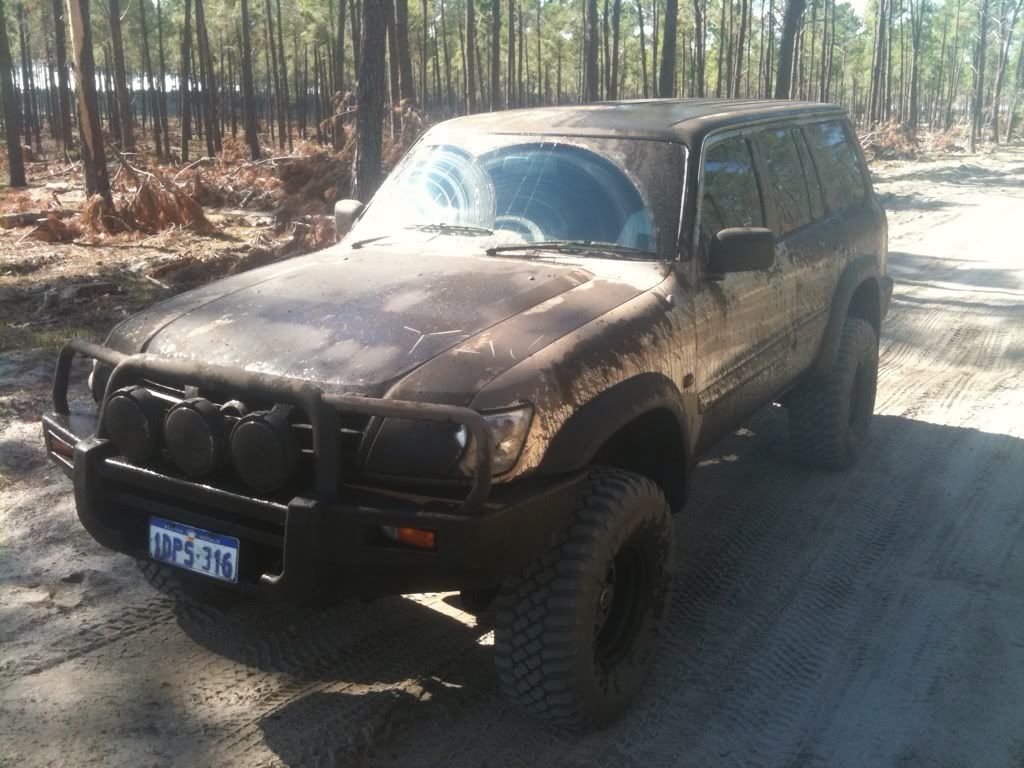
That lasted a few hours...

Image


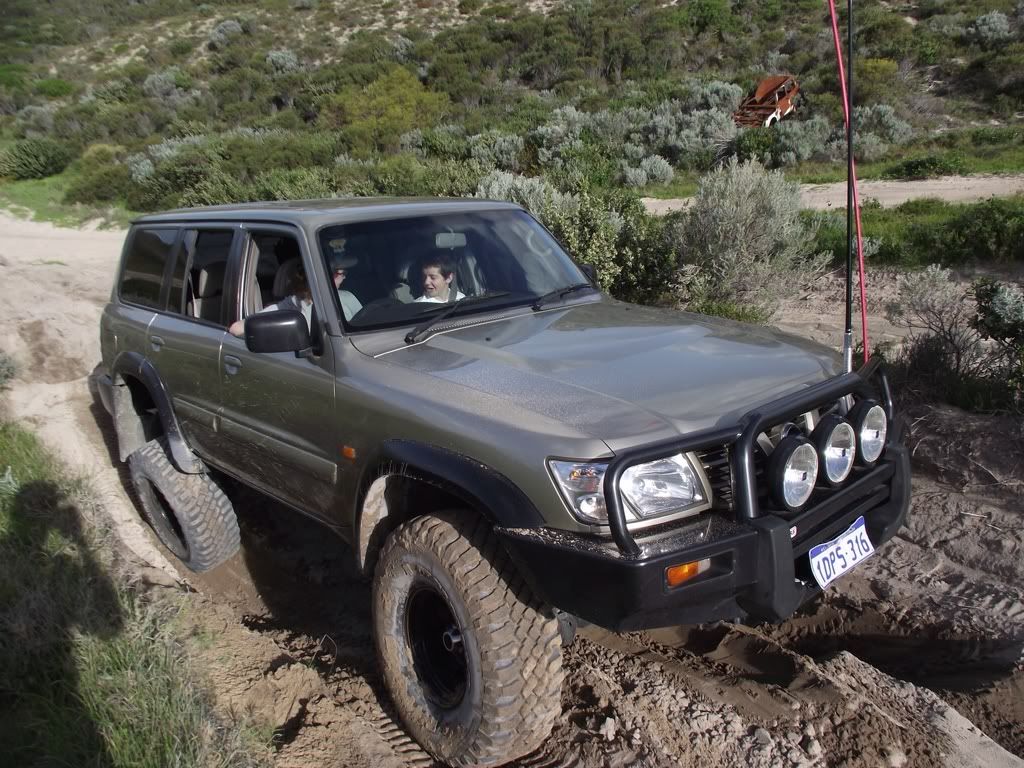
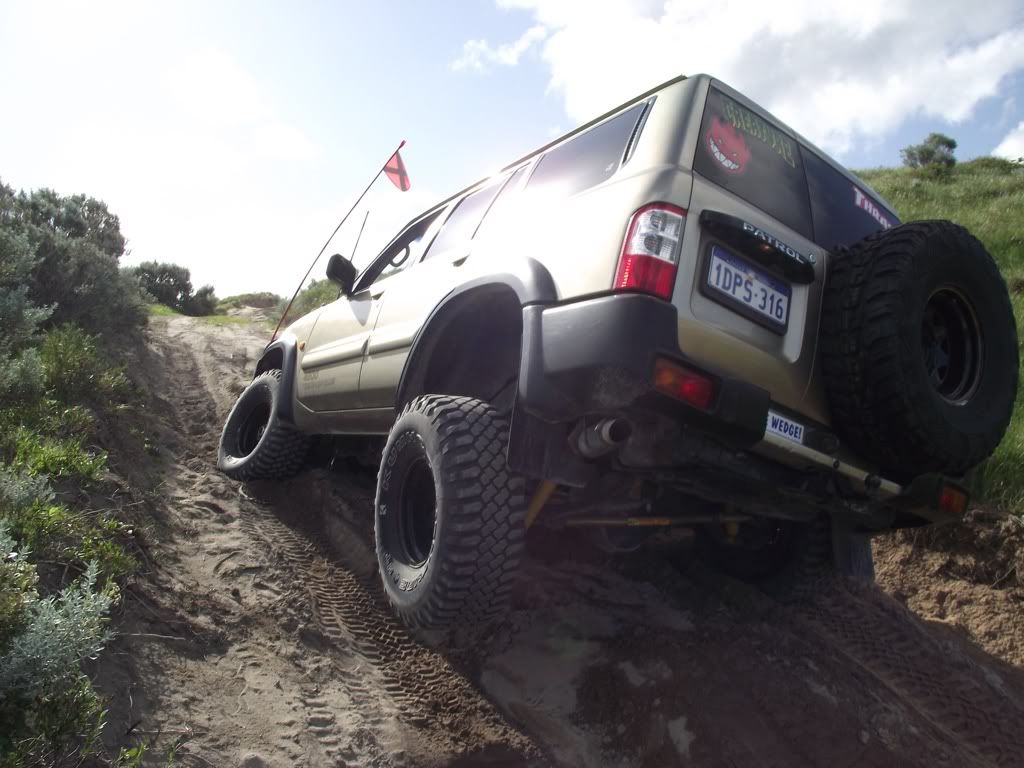
Few other shots when i first got her

Image


Image


Image


Image


Image


Image
 
#2 ·
Since then I've added a few little things. In no particular order:

Converted all the spottie's to HID = amazing!!
Swapped to fully functioning tailights, wired these in once after nightshift and left myself stumped when i ran all the necessary wires over from the passenger side, including the INDICATOR, so when i indicated right, nothing, indicate left, both come on...hahaha
LED interior lights
LED front indicators and both sets of parkers

Image


Rear bar with choice of tyre carriers or jerry holders, added a hi - lift jack mount too, need to make a few changes to this to sturdy it up a bit.

Image


Image


Image


A set of Bolsy's checkerplate top step / sliders

Image


Image


Image
 
#4 ·
Got some marker light to go down the sides, made small brackets from ally angle and attached them on top of the steps, snugged right in against the sills.

Image


Image


Image


Added a new kenwood stereo with a reverse camera, 12' subwoofer, 2 6x9's in the back, 6 1/2" spilts in the front, all soundstream stuff to keep it uniform. I also installed my UHF underneath the head unit.

Image


Image
 
#6 ·
snapped a swaybar link, so i replaced them with these

Image


Did it again, according to the guy i brought them off they were really strong ones...

Image


Been told recently that the links are actually way too long as they are, never knew, just replaced what came with it, i was worried when i had to max out the adjustment to fit em.

I'm running nothing at the moment, until i find out the right answer. Any help on this one?
 
#7 ·
One night at wedge, got bit over confident of the patrol's steep climbing capabilities, and suffered from a lack judgement due to a few excessive bundy's

Image


Image


took about three drunken hours tio get it out, mostly laughing, mate got bogged trying to pull me out backwards so i backed up about 2 m and he snatched me forwards....HARD! pushed my bullbar back and the antenna mount dented the bonnet, smashed one headlight lens and rearranged my spotties a bit, reasons behind our late return to camp didn't go down too well with the girlfriend's
 
#8 ·
One good day at powerlines, too busy driving to get some more shots.

Bit of an ass dunk

Image


Day's damage, creased the bar when i put the wing against a rut wall, fixed with a big hammer!

Image

Image

Image


bashed the quarter out the next day, sustained a bit of cellulite and now the front quarter squeaks over every bump! really annoying, meaning to take it off when i get a chance.
 
#12 ·
started building some rear drawers, few snaps. Some more info here:

http://www.patrol4x4.com/forum/diy-modifications-accessories-40/gu-drawers-air-tank-sub-86160/

Image


Image


Image


Image


Image


Image


Image


Image


needs the following done

- plumb and wire up the compressor and tank

Image


- cut side access lids
- add draw fronts and all latches, hinges etc
- led strip lighting inside, wired off some push rod door switches inside the drawers
- carpeting and angle edging
- probably a few other things


Also got a 12v solenoid valve, thinking of setting it up as like an electronically controlled drain plug, make it easier to depressurise the tank after usage.
 
#14 ·
Latest little project was installing the 3" HID projectors I got off Mick.

all the gear

Image


projector

Image


marked out the shrouds, cut about 5 - 10mm of the bottom to fit em in snugg

Image


removal of plastic indicator lens didn't go so well, good job it was a spare.

Image


put together as chrome

Image

Image

Image


black?

Image


combo?

Image


Liked the black better because it looked really different. admittedly it l;looks better on dark coloured trucks but I'll see what it turns out like when everything's finished.
 
#15 ·
Was hard to commit to spray painting two brand new lights

Image


housing drilled

Image


complete light

Image


Image


angel eyes

Image


devil eyes

Image


both

Image


front end

Image


Image


Deciding whether to paint the shrouds black too, leaning towards it at this stage. Need to still spray my indicators, and pull the whole lot apart to replace my angel eyes with LED's as I broke one during the install :( might give em another lick of paint too.
 
#23 ·
awesome GU mate, clearly not afraid to get a bit hands on, its awesome to see.
I was reading in the paper the other day about auxillary lighting, spotties etc on 4wds, they talked in WA, every spotlight must be one of a pair and when you use them you have to follow all sorts of bull twang protocol.
In saying that, ive seen hundreds of 4bies with similar lighting to yours, but all it takes is that one day where a cop isnt having such a good day
 
#24 ·
Yeah mate I've heard that rule quite a few times, really have to get a grumpy cop to pick you up for one of those silly rules, not like you actually have your spotties turned on when people are looking at you right? Oh well there seems to be heaps of rules like that, rod holders etc. Same rules always apply, keep it clean and tidy, don't drive like a fockhead and you should be right.
 
#26 ·
Ok did a couple things during break.

Picked her up from the mechanics, new safari tuff clutch installed, gone are the days of the heart wrenching gear grinding changes :) Also had the Air idle Control Valve replaced, fixed my idle up verrrrry nicely, was sitting around the 1500 rpm mark now sits as low as 600 rpm. Took a little while to get used to seeing as with the high idle before and my clutch engaging about 1 mm off the floor, it would jerk forward at the slightest twitch of the foot, now it’s a lot more civilized, requiring a bit of stink to get up and going smoothly. Also had my throttle body well and truly scrubbed out, they found a tiny grub screw missing which was causing the butterfly valves to stick making for terribly jerky acceleration. This is all sweet now :)

Also did a fair bit more work on the projector install, got almost everything done, still need to work out a way of painting the indicators black without destroying them…again, doesn’t look too horrendous in the chrome but definitely needs attention. Need to tidy all of the wiring for these new additions. Causing other issues… which brings me to my next point :-/

After all my screwing around with wiring for all the lights I seem to have created an issue. All of the reverse lights now cease to continue working; this also affects my floodlight and reverse camera activation. The lights are actually receiving a tiny amount of power, you can just see the element glowing slightly. Might be to do with all the normal reverse lights (two halogen in the tailights, and two LED in the rear bar) all tracing back to the one standard reverse light cable at the rear, which also serves as the activation for my reverse camera and floodlight :( really overlooked that one quite a great deal :( so now my spotties and one projector is also playing up, sometimes one spottie comes on sometimes two, sometimes all three, sometimes none, can be any combination, often switching from one side the other.

All of these symptoms are telling me that not so well thought out wiring and bad earths are to blame, gonna run over the whole car next break and go crazy on it all, thicker cables, better connectors, relays, it’s something I’ve been meaning to do for a while but always slips to the bottom of the priority list :( Get everything super neat and tidy, over engineered and working flawlessly :) gonna upgrade all the car’s main chassis / body earth points, I do have LOT a extra lighting and never really added it all up.

2 x HID headlights
3 x HID spotties.
6 x LED park lights
2 x CFFL devil eyes
10 x indicators
4 x taillights
5 x brake lights
4 x reverse lights
1 x LED reverse floodlight
6 x marker lights

Think I have enough yet? Haha, couple of LED light bars and I think I’ll be finished.

Worse thing was my newly fixed idling problem turned into the opposite problem, now unlike what it was doing when I got it fixed, it fails to idle higher after cold starts, making the engine idle too low when cold, subsequently leading to stalling on start up unless you held down the accelerator a little, not at all ideal :( I spoke to the bloke who fixed it and he said any shorts and / or voltage drops effect the computer and sensor readings and will screw up the idle, I found this strange to believe but, but it tied in perfectly with my other issues, no mention of these had been given to the mechanic. I was actually quite pleased with his diagnosis and yet again did it reassure my faith in the quality workmanship and specific knowledge that the establishment possessed :)
 
#27 ·
few snaps...

Completed lights, painted the shrouds black too, i think it looks heaps better :)

Image


with the LED angel eyes on, these things are amazingtly bright, match my other LED parkers nicely. impossible to take a photo that shows a realistic representation, they are a clear defined ring of lights from far away as apose to one big bright blur, black reflectors help with this i think.

Image


Green devil eyes, hard to take a good shot of these too, look really cool, love how the light is contained within the lens anmd hardly any shines out forwards. Give a nice deep lens colour :)

Image

Image


all the lights

Image


Custom switch panel i whipped up, wanted something that looked really neat, got these flush mounting rocker switches from jaycar for about 3 bucks a pop, i think you can get them in solid black too, 20mm hole saw, I like the look. forgot to get a pic of it instaleed but you get the jist, easily within rech too.

Image

Image


Slowly trying to phase out my cheap crap tools, nearly copped this one haha

Image